The following is a guest post by Thomas Deatherage and originally appeared on his blog. Thomas is currently a student at The Flatiron School. You can follow him on Twitter here.
I’ve just begun collaborating on a project that I’ll present next month for an NYC on Railsmeetup. At this point my group and I intend to develop a mobile web-app using JQuery Mobile (JQM), Rails, and potentially PhoneGap. I’ll follow up in later posts with details about the project and include some of our code as we build, but for now since I’ve never really used JQM, I thought a good post would be to walk step-by-step through setting up a basic JQM frontend in Rails. JQM is an incredibly convenient and straightforward tool that basically relies on HTML5 custom data-attributes to create a powerful UI for mobile devices.
What you’ll need
First you should have RVM, Ruby, and Rails installed on your machine. Additionally, you’ll want some kind of mobile device emulator. I’m using the Ripple Emulator that’s availables as a plugin for Chrome. It’s easy peasy to use—you just right click on a site that you want to render as though you were on a mobile device and select the emulator enabled option. That’s it.
Make the Rails App
Generate a new rails app as you usually would and then cd into it


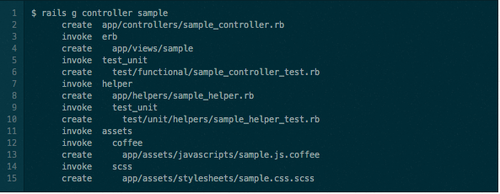
Set up a sample controller
Next we’ll set up a controller, a view, and the routes.
Next go into your routes.rb file (located under the config directory in the root of our app) and add a route to the index action of sample controller:

Next be sure to delete ‘public/index.html’.
Let’s now open up the sample controller and add an index action.

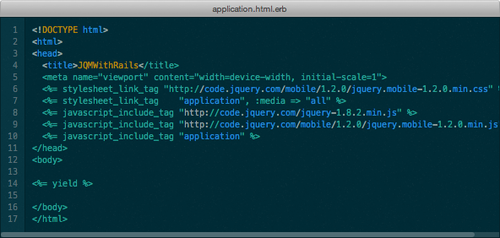
For this basic walkthough, we’ll make it easier on ourselves and use a CDN to link to the appropriate JQM files. Maximiliano Firtman in JQuery Mobile: Up and Running recommends that if you’re planning on using a hybrid native web app, you should use local files rather than the CDN. At some point I’d like to talk about making an app like this, but for now the CDN link should be just fine. So let’s head over to the layout. Open up ‘views/layouts/application.html.erb’
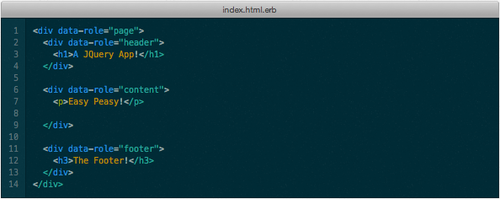
Let’s now go ahead and add a ‘index.html.erb’ file to ‘views/sample/’
This is where the heart of the JQM frontend work will go. Like I said before, for the most part it’s really just adding appropriate data-attributes to HTML tags. The general structure of the body will include a header, a content, and a footer all wrapped inside a page.
Go ahead and fire up your rails server if you haven’t already and check out the results using Ripple Emulator or whatever other emulator you’re using.
Let’s round out our app by adding several features to make it feel just a little bit better.
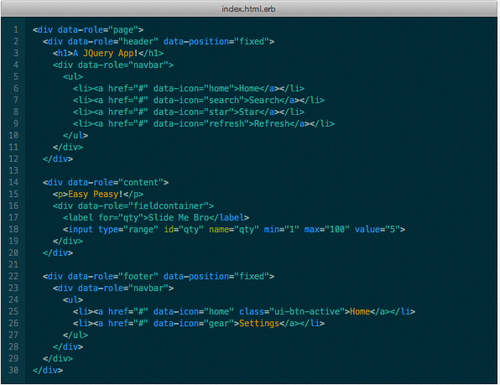
The final product should now end up looking something like this:
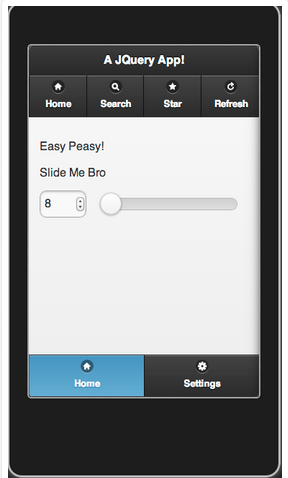
And that’s it! Have fun and rock on!
Written byFLATIRON SCHOOL
Make yourself useful.
