This guest post was written by Flatiron School student Adrian Prieto. You can read about his coding journey at his blog. Take it away, Adrian!
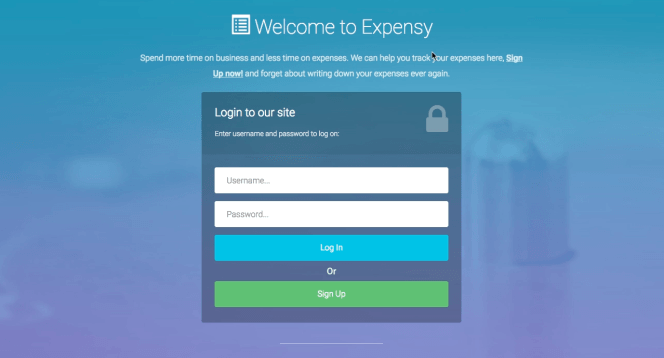
Creating a web application from scratch can be intimidating at first, but not necessarily hard. I just finished building a really cool expense-tracking web application called “Expensy,” and even though it took me a couple of days to get it completely working, I thought it was going to be harder. By following certain steps, it was a much easier process than I expected.
Here are the steps I followed to build my own Sinatra web app:
1. Have a clear idea of what you want to create and what it’ll look like.
You don’t need to know exactly all your code before you start, but you definitely need to have an idea of what your project is going to look like, as well as answers to questions like “how many models am I going to have? How many views?” This should be clear before you move on and get started. Mine looked like this:
├── Gemfile
├── Gemfile.lock
├── README.md
├── Rakefile
├── app
│ ├── controllers
│ │ ├── application_controller.rb
│ │ ├── categories_controller.rb
│ │ ├── expenses_controller.rb
│ │ └── users_controller.rb
│ ├── models
│ │ ├── category.rb
│ │ ├── expenses.rb
│ │ └── user.rb
│ └── views
│ ├── categories
│ │ ├── categories.erb
│ │ ├── edit_category.erb
│ │ └── show_category.erb
│ ├── expenses
│ │ ├── create_expense.erb
│ │ ├── edit_expense.erb
│ │ ├── expenses.erb
│ │ └── show_expense.erb
│ ├── index.erb
│ ├── layout.erb
│ └── users
│ ├── create_user.erb
│ └── edit_user.erb
├── config
│ └── environment.rb
├── config.ru
├── db
├── public
├──
2. Create your project folder.
After you have a clear idea of what your project is going to look like, create your project folder and sub-folders; run bundle init in the command line while inside of it, and this will create a Gemfile.
3. Create your config folder and environment file.
This is a very important file; it’s where you get your database connection ready, and it will connect your app folder with the rest of the files that require it as well.
require 'bundler'
Bundler.require
ActiveRecord::Base.establish_connection(
:adapter => "sqlite3",
:database => "db/development.sqlite"
)
require_all 'app'
4. Add gems to your Gemfile.
While it is OK to add more gems later on, it is important that you add all the gems you initially need to make your development process function properly, like Sinatra, ActiveRecord, sqlite3, rake, require_all, shotgun, etc. Here were mine:
# A sample Gemfile
source "https://rubygems.org"
# gem "rails"
gem 'sinatra'
gem 'activerecord', :require => 'active_record'
gem 'sinatra-activerecord', :require => 'sinatra/activerecord'
gem 'rake'
gem 'require_all' #=> Helps to load dependencies
gem 'sqlite3'
gem 'thin'
gem 'shotgun'
gem 'pry'
gem 'bcrypt'
gem "tux"
gem 'rack-flash3'
gem 'sinatra-flash'
Run bundle install after adding them.
5. Make the most important file of your App: config.ru.
Here you will need to load your environment; it’s also the place where you are going to mount your application controllers.
require_relative './config/environment'
if ActiveRecord::Migrator.needs_migration?
raise 'Migrations are pending. Run `rake db:migrate` to resolve the issue.'
end
use Rack::MethodOverride
# use OtherController1
# use OtherController2
# use OtherController3
run ApplicationController
6. Create an application controller.
In your app/controllers folder, create an application_controller.rb file. It should look something like this if you are enabling sessions; make sure your other controllers inherit from this controller.
class ApplicationController < Sinatra::Base
configure do
set :public_folder, 'public'
set :views, 'app/views'
enable :sessions
set :session_secret, "password_security"
end
get '/' do
"Hello, World!"
end
end
Test it out! Just run shotgun in your command line:
[19:32:18] (master) sinatra_app
// ♥ shotgun
== Shotgun/Thin on http://127.0.0.1:9393/
Thin web server (v1.7.0 codename Dunder Mifflin)
Maximum connections set to 1024
Listening on 127.0.0.1:9393, CTRL+C to stop
Check your browser at your local host address. If you see “Hello, World!”, you’re doing great!
7. Make a Rakefile.
A Rakefile is tailored to specifying tasks and actions. It should load your environment and
require ‘sinatra/activerecord/rake’. I added a task to start a console. It should look like this:
require_relative './config/environment'
require 'sinatra/activerecord/rake'
task :console do
Pry.start
end
To open your console, just type rake console. Here you can test your models and database later on your development process. It gives you a direct connection to your application’s ecosystem. It’s very useful and you’re going to need it.
8. Add your Models.
At the end of the day, the model file is a Ruby class. If it has a corresponding database table, it will inherit from the ActiveRecord::Base class, which means that it has access to a number of methods that assist in working with the database, establish all your model associations (very important), and if you are enabling sessions and using bcrypt, make sure your user model has_secure_password, just like this:
class User < ActiveRecord::Base
has_secure_password
has_many :categories
end
class Category < ActiveRecord::Base
belongs_to :user
end
9. Create a Database folder (db), run your migrations to create your tables.
This is the place where all your migrations will be staged, and where your database is going to be placed. Simply mkdir db inside of your project main directory.
Now it’s time to run your migrations. By typing rake -T, you can see a list of rake tasks:
rake db:create              # Creates the database from DATABASE_URL or con...
rake db:create_migration    # Create a migration (parameters: NAME, VERSION)
rake db:drop                # Drops the database from DATABASE_URL or confi...
rake db:environment:set     # Set the environment value for the database
rake db:fixtures:load       # Loads fixtures into the current environment's...
rake db:migrate             # Migrate the database (options: VERSION=x, VER...
rake db:migrate:status      # Display status of migrations
rake db:rollback            # Rolls the schema back to the previous version...
rake db:schema:cache:clear  # Clears a db/schema_cache.dump file
rake db:schema:cache:dump   # Creates a db/schema_cache.dump file
rake db:schema:dump         # Creates a db/schema.rb file that is portable ...
rake db:schema:load         # Loads a schema.rb file into the database
rake db:seed                # Loads the seed data from db/seeds.rb
rake db:setup               # Creates the database, loads the schema, and i...
rake db:structure:dump      # Dumps the database structure to db/structure.sql
rake db:structure:load      # Recreates the databases from the structure.sq...
rake db:version             # Retrieves the current schema version number
So if you want to create a new table, just type rake db:create_migration NAME=create_yourtablename, then create each table:
├── db
│ ├── development.sqlite
│ ├── migrate
│ │ ├── 20160720175203_create_yourtablename.rb
Then modify you migration file according to your needs. (Don’t forget model associations!)
class CreateYourtablename < ActiveRecord::Migration
def change
create_table :yourtablename do |t|
t.string :something
t.string :something
t.integer :something
end
end
end
And finally run rake db:migrate, and all your tables will be added.
10. Add your Controllers, Routes and Views.
It’s time! You are the artist—from here on, this app is your canvas. Code away and create something amazing!

Good luck! I’m also including a link to my Github repository in case you want to check out my code and/or try out my app.
Interested in making web applications like Adrian? Start learning to code with Flatiron’s Bootcamp Prep Course.
Written byFLATIRON SCHOOL
Make yourself useful.

